Check out our latest products
![[2025 Upgraded] Retractable Car Charger, SUPERONE 69W Car Phone Charger with Cables Fast Charging, Gifts for Men Women Car Accessories for iPhone 16 15 14 13 12, Samsung, Black](https://i1.wp.com/m.media-amazon.com/images/I/61SaegZpsSL._AC_SL1500_.jpg?w=300&resize=300,300&ssl=1)


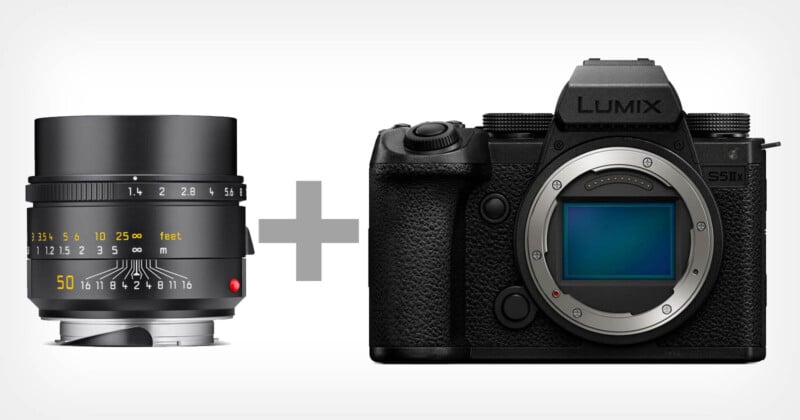
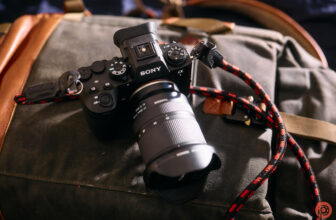
I recently did a deep dive in my quest to determine the pros, cons, and in-betweens of using M-mount lenses on my Panasonic Lumix S5 IIx body. I also compared the lenses on other cameras. Some results were as expected, others were not and there were a few surprises.

When I started on this endeavor, Jonathan Slack, a reviewer and beta tester of Leica equipment, asked me a very good question: Why not just get an SL3 (which Leica says is optimized for M lenses)?
In part, my answer comes down to personal preference (size, weight, handling) and also cost.
It would also depend on how well other options performed. Given the relationship between Leica and Lumix, I was especially interested in whether I could confidently use M-lenses on a Panasonic Lumix camera.
Some of you are probably in the same boat. So here goes.

Zen, Birds, and Practicality
Perhaps in the same way birds are imprinted with their parents at birth, I may have been imprinted with rangefinders.
At age 13, I got my first 35mm camera, a hand-me-down Kodak Retina IIIc rangefinder. While working in a camera store to put myself through university, I managed to buy a Leitz Minolta CL kit which had 40mm and 90mm Minolta M-Rokkor lenses (Leica M-mount.) That camera went with me everywhere.
I started my photography business after graduating, still in the film age. For that, I went to SLRs, followed by auto-focus SLRs, then on to DSLRs. As a full-time photographer, and having started from scratch, it generally hasn’t been practical for me to own Leica gear.
From a business standpoint, it has made more sense to own capable but less expensive systems. I started with Canon and eventually moved to Sony and Fujifilm. Along the way, I got some Leica gear but it never really worked out as an everyday system for my photo business.

With all the excitement of the digital era, I didn’t look back.
I suppressed it for a while but eventually found myself missing the zen experience I remembered from my days using all manual cameras and lenses.
Returning to My Roots
Enter M-lens adapters: I can get beautiful compact manual focus lenses and put them on my digital Electronic Viewfinder (EVF) cameras, at least in theory. Having made my living for many years selling large fine art prints, I am very particular about the quality of the files coming out of the camera.
When I make 2 meter/~6 ft prints for patrons (not that unusual), everything must be flawless or nearly so. There are exceptions for some types of images but those are, well, exceptions.
Owning many Sony cameras over the years, I realized that there are more lens adapters for Sony than just about any other full-frame camera. Sonys may be soulless but are technically competent cameras so I figured why not try putting some nice M-mount lenses on one.
While researching the subject, I learned that the thick sensor stack (sensor + sensor filtration) in the Sony doesn’t play well with some rangefinder lenses, especially wide angles. Thicker stacks can cause smearing and exacerbate weaknesses, especially on the edges and corners of the image. Thinner stacks tend to perform better.

I knew that Leica made the SL line, such as the SL2/S and SL3/S models to work well with M lenses. SL bodies presumably have a thin sensor stack for this purpose. But an SL3 wasn’t in my budget and after using an SL2 and SL2-S I wasn’t so keen on the size and weight either.
Hunch
I had a hunch that with the Leica/Lumix relationship, the S5II(x) might have a thin enough stack to be suitable for rangefinder lenses or at least thinner than a Sony a7 series body.
I got in touch with Ilija Melentijevic, founder of Kolari Vision, knowing he is an expert on sensor stacks. Amid all the great information he provided, he confirmed my hunch that a Panasonic Lumix S5II/S5IIx has a thinner stack than a Sony a7R series camera. Whether the S5II(x) sensor stack was designed with Leica input or not, I don’t know, but my newfound knowledge about the thickness, or perhaps thinness, set me on a path.

The Proof is in the Pudding
Wanting to try all this out for myself, I bought both the S5 IIx and a Sony a7R III, which I had owned in the past, along with adapters for M-mount lenses. Within a week I returned the Sony body and kept the S5 IIx for its noticeably superior performance with my M-mount lenses. Although I have an extensive Fujifilm system, I didn’t have any great desire to use the M lenses with my X-T5 bodies except perhaps, for my infrared-modified one.
I am grateful to Camera West in Walnut Creek, California, and store manager Norman, for loaning me the Leica gear I needed to do a thorough, hands-on investigation. This allowed me to evaluate M-mount lenses on my Lumix S5IIx and compare that to the SL2-S and also an M11.
The SL2-S is a very good Leica counterpart to the S5IIx (no SL3-S bodies were available.) In case you’re wondering, my getting the ‘x’ version of the S5II has no significance other than I like the aesthetics of it better. For still photography, there is no difference between it and the S5II.
My main goal was to see how the S5 II(x) did against the SL2-S with various M-mount lenses but it was also useful having the M11 as a baseline/standard for reference when I needed it.

The M-lens Cadre
Here are the lenses I used:
I didn’t expect the 75mm to be much of a challenge for the cameras. But it had done poorly on the edges with the thick-sensor-stack Sony until about f/5.6, so I included it.

Methods
I first tested some M-lens to L-mount adapters to find the best one. I wanted to use the same adapter for both the S5IIx and SL2-S to eliminate that as a variable. I settled on the Light Lens Lab adapter.
I conducted tests on all the lenses at both infinity with a detailed horizon and in the studio at closer distances using ISO 12233 resolution test targets. My wall of targets is arranged so that lenses are at fairly realistic working distances when testing. This may not be entirely scientific but I’m not counting lines of resolution on the charts and it’s quite useful for comparisons among lenses. As a side benefit, I have collected a useful reference for dozens of lenses over many years.
In this context, my judgment of sharpness is really perceived sharpness as there are many factors that contribute to how I, or any human, “sees” sharpness in an image.
This isn’t meant to be a typical review but I wanted a consistent way to compare the lenses. Perhaps more meaningful, to me anyway, are the shots I did of landscapes on the coast, which encompass a variety of distances, tones, and details in a single frame.
Expectations and a Surprise
28mm
While embarking on this project, Jonathan Slack offered his input (thanks!) He said: the “easiest way to test is to use a 28mm or 35mm lens near or at infinity, when the rear element is closest to the sensor. Then, look off-axis. Many people don’t seem to realize that the problem is worst at infinity”
I chose a Leica 28mm f/2.0 Summicron-M and it turned out to be the most challenging of the bunch. It has a prominently protruding rear element that is close to the sensor and moves closer yet at infinity.

Although the 28mm “Cron” (Leica users’ parlance for Summicron) does well enough with the S5IIx at f/5.6 and looks very good at f/8.0, the SL2-S provides better images, especially at wider apertures and at the corners and edges.


I should note that even on the M11, the type of camera for which this lens was designed, the 28mm f/2 Summicron exhibits soft corners from wide open through f/4.0. On any of the bodies discussed here, I would stop the 28mm down to f/8.0 for a large print. With a main subject only in the center, I would be comfortable with it wide open.
21mm
After testing the 28mm f/2.0 Summicron I assumed that an even wider angle lens, such as the Voigtlander 21mm f/1.8 VM lens I used, would have noticeably worse performance on the S5 IIx. It actually did pretty well. The infinity test with such a wide angle makes it more difficult to scrutinize fine detail because that detail is so small. Sometimes I had to zoom in to 200% to evaluate differences. Bear in mind that if you are going to make a print, even a large one, viewing at 200% doesn’t tell you much that is useful.
When I make large prints, I will view them at 50% on my monitor to get an approximate idea of how a print will look when examined closely. But even 50% is greater detail than someone sees at normal viewing distances. After decades of doing art exhibitions of my work, I could always when people looking at my artwork were photographers because their viewing distance was based on the length of their nose!

The 21mm lens doesn’t show as much difference between the SL2-S and S5IIx as the 28mm Cron did. At the widest apertures, the SL2-S has slightly better sharpness in the center but the S5IIx appears slightly sharper mid-frame. I think this is more about the contrast and lack of/or less anti-aliasing (AA) filtration of the S5 II sensor.
By f/4.0, the optimum aperture for this lens, there isn’t much difference, even out to the far corners. If I were to use the S5IIx file, which has a little more color fringing, I would use the “Remove Chromatic Aberration” checkbox in Lightroom or the equivalent in whatever raw processor I use.
50mm
This is the one that surprised me. The Leica 50mm f/2.0 Summicron-M certainly lives up to its long-established reputation for excellence. The surprise was that it performed better on the S5IIx than the SL2-S. This was the case in all parts of the frame, though was most noticeable in the center, wide open at f/2.0.


By f/4.0 the two cameras are close to equivalent in the center. But the S5IIx is still slightly better at the edges and corners, from f/2.0 through f/8.0.
I didn’t believe the results at first, so I reshot the SL2-S on a different day and rechecked everything. I also compared both the multi-shot, which produces a 96MP image, and the standard 24MP versions*.
This particular example demonstrates that not only can I achieve comparable results on my S5IIx to pairing this lens with the Leica SL2-S, but even a bit better.

75mm
I also tested my Voigtlander 75mm f/1.9 Ultron VM, a really compact and fast portrait-length M-mount lens. At most apertures, there is a slight advantage to the SL2-S but it sometimes requires 200% to see it.

There isn’t as much difference in the corners as with some of the other lenses. Typically a longer focal length shouldn’t exhibit as much “smearing” of the edges and corners as a wide angle lens so I didn’t think this lens would be much of a challenge. I will say that when I tested it on a Sony a7R III, it was quite soft (‘smearing”) at the edges.
Interestingly at the closer tested distance for this lens of 3m/10ft in the studio, the S5IIx yields noticeably better sharpness in the center wide open. Once the lens is stopped down, they are fairly close with perhaps a slight edge to the SL2-S overall.
Bottom Line
Yes, there are some sacrifices using M-mount rangefinder lenses on the Panasonic Lumix S5 II/S5 IIx body though not as many or as sizable as I would have expected prior to doing all this. Leica seems to have optimized the SL2/S and SL3/S bodies to work well with their rangefinder lenses. The SL2-S generally did a great job with the M-mount lenses I used. But in a few cases, I feel the M11, not unexpectedly, got the most out of them.
The whole point of this exercise was to see if I could take advantage of the benefits of a non-rangefinder mainstream camera, possessing an easy-to-view EVF, image stabilization, and other accoutrement of a modern digital camera body, sans auto-focus of course.

Is it sacrilege to put those beautiful and expensive German-made (or Canadian or Portuguese-made) Leica M-lenses on a Japanese-made Panasonic camera? That depends on your sentiments.
Like many of us, I put Japanese-made Voigtlander lenses on my Leica so why not the other way around? I will admit that you do indeed lose some of the Leica je ne sais quois in doing so. For that, there is really no substitute.
Consider that the cousin to the Lumix S5II/S5IIx, the Leica SL3-S, is currently about three times the price. If you also prefer the size, weight, and handling of the S5II/S5IIx, then the Lumix S5II/S5IIx might just be a sweet spot.

What I Used for This Project
- 4 camera bodies and 7 lenses (3 bodies and 4 lenses included in the article).
- 197 studio resolution test images for comparisons shot on 3 different days.
- 254 infinity scene tests shot on 2 different days to account for lighting differences.
- 461 images of nature and people on several occasions, for enjoyment and comparisons. It’s gotta be fun, or I wouldn’t do it.
- Lots of hours comparing images of each lens at various apertures and magnifications. I didn’t keep track but was bleary-eyed at the end.
* Both of these cameras allow you to use built-in pixel shift to achieve a 96MP resolution. Although there is a handheld mode for this that works pretty well, I locked everything down on a tripod. It proved to be a real and useable improvement in resolution, allowing me to examine fine detail.
About the author: Joel Wolfson is an internationally published photographer who loves teaching as much as shooting. The opinions expressed in this article are solely those of the author. He shares his 30 years of experience as a working pro with other photographers and enthusiasts by way of his workshops, 1-on-1 training, webinars, articles, blog and speaking engagements. He is one of the pioneers of digital photography, having conducted digital photography seminars for Apple and other corporations starting in the early 90s. This article was also published here.
![[True Military-Grade] Car Phone Holder【2024 Stronger Suction & Clip】 Universal Cell Phone Holder for Car Mount for Dashboard Windshield Air Vent Long Arm Cell Phone Car Mount Thick Case,Black](https://i2.wp.com/m.media-amazon.com/images/I/715PBCuJezL._AC_SL1500_.jpg?w=300&resize=300,300&ssl=1)
![[エレコム] スマホショルダー ショルダーストラップ 肩掛け ストラップホールシート付属 丸紐 8mm P-STSDH2R08](https://i3.wp.com/m.media-amazon.com/images/I/51BMFf06pxL._AC_SL1500_.jpg?w=300&resize=300,300&ssl=1)